One of the advantages of a premium user is that they can add a custom list, map or trail to their website or blog. To get started, you must first create a list, map or a trail which is quick and easy. Follow our How to create a list, map or trail step-by-step tutorial.
In this tutorial you will learn:
- How to get a my favourites List ID
- How to add a custom list, map or trail to your website or blog
How to get a my-favourites List ID
In order to generate your code for your trail content, you will need your List ID which you can find easily by following the steps below.
- Create a list, map or trail by following our step-by-step tutorial. If you already have your list, map or trail set up then you can skip to the next step.
- Click on the EDIT link in the filters panel to open the pop-up.

Example of clicking onto the EDIT link in the filters panel
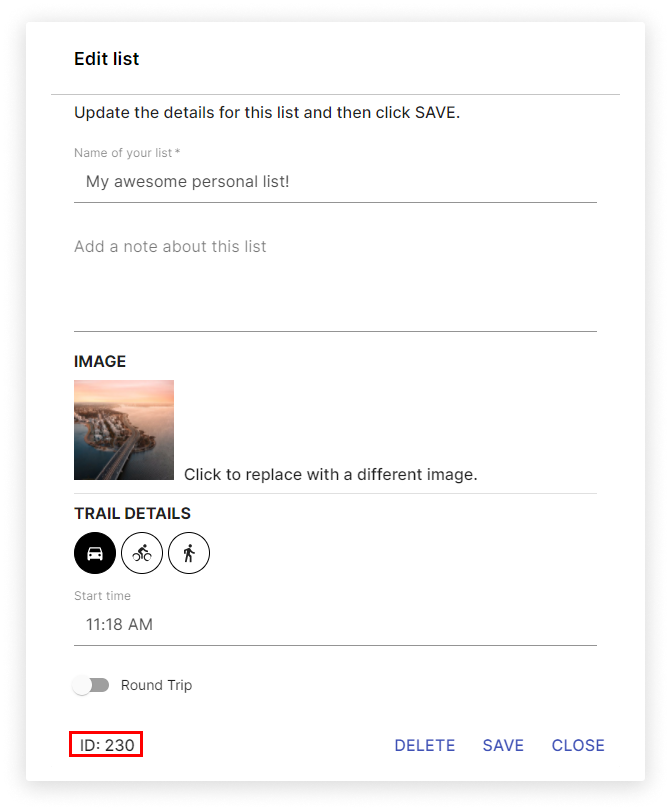
- Find the List ID which is located at the bottom-left corner of the EDIT pop-up and save this number!

- Contact localista support at info@localista.com.au and provide us with your List ID. We will generate a code for you that you can use to display the list, map or trail on your website or blog.
- Once you have your code sent to you, you will need to paste the code as RAW HTML on your site or blog. For more information on placing your code on your site or blog, visit our tutorial here.
We are currently in the process of revamping our Content Generator to include a list, map, trail code and a Smart-Link Builder, but for the time-being please contact localista support to get your code generated.
Additional premium user features:
- Did you know that premium users can also add smart-links to engage viewers? To learn how to use smart-links, visit our smart-links tutorial.